
How to setup Amped Wireless Router R10000?
 In this article, we guide you through the steps that will help you to set up your Amped Wireless router within seconds of time. Amped wireless has provided its users with www.setup.ampedwireless.com web address which in turn can be used for Amped wireless router login and setup.
STEP 1:
Before you begin to set up the Amped Wireless Router make sure that you disconnect and switch off the power of any existing router if you have. If you do not have an existing router you can skip this step and go to step 2 directly.
STEP 2:
Switch off the power of your modem. To do this you have to disconnect the modem’s power adapter from the power outlet. If your modem has a battery backup then you have to make sure that you remove the battery from your modem.
NOTE: Do NOT power on your Modem till you reach STEP 4.
STEP 3:
Now the Amped router setup actually starts. Connect your Amped high power router to your modem. To do so, connect one end of the blue Ethernet cable that comes with your Amped Wireless router to your modem. The other end of the cable gets connected to the blue modem port on Amped high power wireless router.
NOTE: Do NOT connect the power adapter to the High Power Amped Wireless Router at this time.
STEP 4:
Switch on the power of your modem and to do that please plug the power adapter and if your modem had battery backup, insert your batteries to power on the modem. Give 1 to 2 minutes for your modem to initiate.
STEP 5:
- This step involves turning on the power of your Amped Wireless router and connecting it to your computer. To this follow the points below:
- Attach the two antennas on the left and right ends of your Amped Router
- Look for the grey Ethernet cable that comes with your Amped Router to the available network port on your computer.
- Now attach the Power Adapter to the Amped High Power Router’s port and a power outlet.
STEP 6:
Open any web browser from your computer. To set up your amped wireless router it is mandatory to enter the setup web address into your browser. The Amped router setup web address is http://setup.ampedwireless.com. If this URL does not work then use the following URL: http://192.168.3.1. You will be prompted to enter the login information. Enter the default username and default password: admin/admin for both.
What shall I do if I am facing problem in accessing the web menu via setup.ampedwireless.com or through the IP?
In case you are having trouble in accessing the web menu, all you have to do is disable the third party firewall, for example, Norton/Symantec/Windows. Also, check that your computer is NOT connected to any wireless networks.
QUICK TIP: To access the setup menu you do not require Internet access. The Amped Setup menu is served from the Router.
STEP 7:
A window will appear displaying the message “Welcome to the Smart Setup Wizard”. It is this Smart Setup Wizard that guides you through the below-mentioned settings:
Internet Connection Settings
System Clock
Wireless Settings
To begin, click on the Start tab present at the center bottom of the wizard window.
STEP 8
To configure your Internet connection, click on the “Automatic Configuration” tab. More advanced users who wish to configure their connection manually can do so by clicking “Manual Configuration”.
If the Automatic Configuration was successful, you will be navigated to a Configuration Successful page.
You will see on bottom right, “Next” tab. Click on it to continue.
STEP 9:
To set the System Clock, click on the Sync tab to synchronize the System Clock. This sync will enable the clock, date and time to sync with that of your computer. Click Next to continue.
STEP 10:
To configure your Amped Wireless Router settings type the default ID of your wireless network that is: Amped_Network. If you want to change it you can enter the new name in the SSID field. Any user who wants to connect wirelessly to your Amped Router will use this ID to identify your wireless network. Click Next to continue.
STEP 11:
- A window displaying wireless settings > security settings will appear. The default Security Key (WPA/WPA2) of your wireless network is wireless. If you wish to change it, you can enter a new network security key which should be minimum 8 characters long.
- Click on the Next tab to apply your settings. Wait for a minute for your Amped High power router to reboot. Once the countdown finishes, the page will automatically reload. In case it fails to do so refresh the page manually or check your connection to the router.
- Congratulations, you have successfully completed your Amped wireless router. Your settings are now saved.
I am unable to login to the Amped range extender page via the IP address 192.168.1.240. What shall I do?
 Try any of the two tips given below as a solution for your above problem:
Tip 1:
- Cross check that your router is connected wirelessly or through hard-wire.
- The URL that you have to enter the web browser should be ampedwireless.com.
- The above URL should be entered in the address bar, not the search bar.
- Sometimes trying from alternate Web or Internet Browser also works.
- Open “Run” command (for Windows OS). Then press Windows button + R simultaneously on the keyboard.
- Type iexplore 192.168.1.1 or iexplore ampedwireless.com and press Enter or hit ok.
Tip 2:
- Cross check that you are connected to your router’s network wirelessly or through hard-wire.
- Type the URL “ampedwireless.com” in the address bar of the web browser. In case this URL does not work then try the IP address 192.168.1.240
- If the page still does not open try to reset the browsers and restart your pc.
- Now try again and it will work now.
Which is the Best Amped Extender and how do we Set it up?
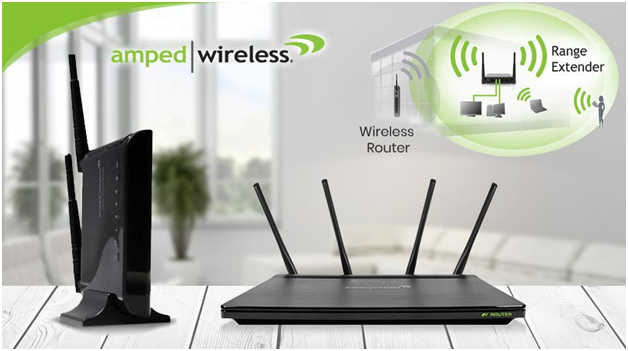
 Imagine yourself working on an important assignment or project that requires immediate submission via email today to your boss and all of a sudden your wifi gets disconnected? If this happens with you most of the time, do not freak out as it is a normal issue. These issues arise due to dead zones at your place. All you need is a device like Amped extender. With the Amped range Extender you can eradicate all of your wifi range issues, and enjoy a stable wifi connection all day long. If you have never used Amped wireless extender setup before, then you must try it today!
So, let us get started on how to up your Amped Extender.
Steps for Amped Extender Setup
- Locate and choose an optimal location, to place your amped range extender.
- By optimal location, we mean a place between your wifi router & area with dead zones. Once you have placed the Amped extender at the optimal location, try to connect your PC or tablet with your Amped extender.
- For connecting first, attach the antennas, included with your Amped extender.
- Next, carefully plug your Amped extender into the power outlet.
- Now you have to connect yourAmped range extenderto the wifi network, named Amped_REC10.
- Users having Windows OS, will get the pop message, saying “Do you want to set up your network?” You can either choose “Connect to the network without setting it up” or you can choose “No, just connect”.
- Now open any installed web browser on your wireless device.
- In the address bar of your browser, type in the default web address, http://ampedwireless.com
- If the above URL fails to work, then you can try to open the amped dashboard, through IP address http://192.168.1.240
How do I setup Amped Wireless RE2600M AC2600 Wi-Fi Range Extender?
 Today The Amped RE2600M high-power Wi-Fi range extender is one of the most powerful range extenders available in the market especially for the homes that have muti-devices.
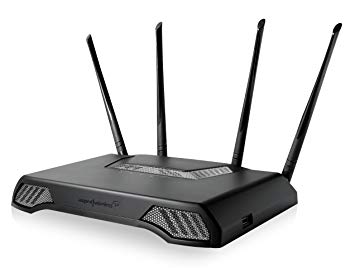
The main features that Amped RE2600M high-power Wi-Fi range extender offers are:
- Built with powerful Dual-core processors
- 4 antennas
- 16 high power amplifiers; that delivers up to 15,000 square feet of additional Wi-Fi coverage.
- Extremely high speed, range, and reliability even if multiple devices are connected to it.
- MU-MIMO technology allows multiple devices to receive data all at once without the need to buffer.
For setting up Amped RE2600M extender you first need to find an optimal location at your home. Choosing the location for installing the range extender is a very important step. The best location for setting up your Amped extender should be somewhere midway between your Wi-Fi router and the dead zone. The next step involves making some hardware connections before you can proceed to Amped login RE2600M extender.
Establishing Hardware Connection:
- The first thing you have to do is to attach the antennas of your range extender including the high gain antennas by screwing them into the antennas connectors and then connect it to your computer.
- Plug your Amped range extender into a power outlet.
- Connect your computer to the Amped range extender’s Wi-Fi network: Amped AthenaEX_2.4 or Amped AthenaEX_5.0.
Launch a web browser:
Following steps will tell you about how to login to Amped RE2600M wireless extender from your computer or tablet.
- For this open a web browser and in the address bar of your browser type in http://setup.ampedwireless.com
- If the above URL fails to work or in other words if the web menu does not open, you can type the following IP address into the address bar of your web browser: http://168.1.240
QUICK TIP: We recommend any of the following Web Browsers:
Google Chrome, Apple Safari or Internet Explore.
Please avoid using Mozilla Firefox.
Dashboard:
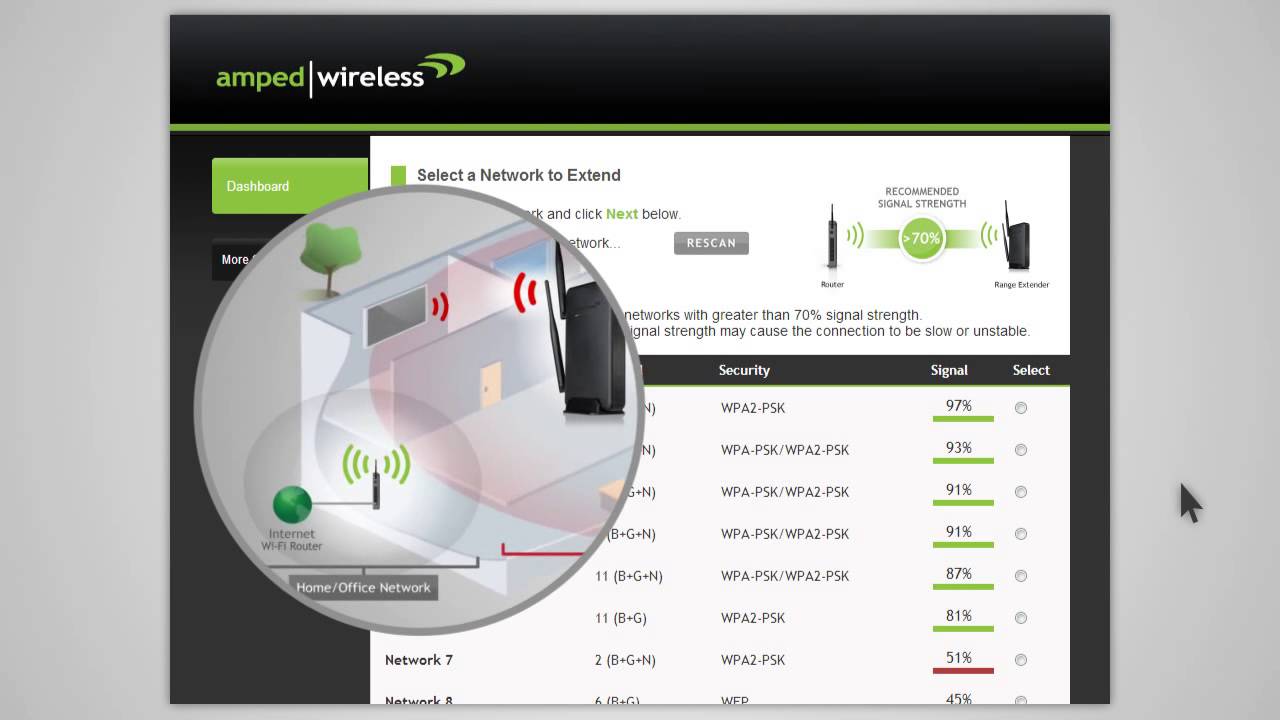
The dashboard provides or tells you the current status of your Amped range Extender. To find the available networks that you wish to extend, please click on ‘Scan’.
Scanning a home network to extend:
When you click “Scan” it will provide you with the list of all available 2.4 GHz or 5.0 GHz wireless networks that your Amped Range extender detects. Select the wireless network(s) that you would like to repeat. You can select both the 2.4 GHz and 5 GHz network names if you are using a dual-band router. To go to the next step Click ‘Next’.
QUICK TIP: we recommend you to select a wireless network with signal strength greater than 70% for a reliable connection.
Setting up your Home network security:
A user will be prompted to enter a security key if their wireless network is enabled with wireless security. If you have selected both 2.4 GHz and 5.0 GHz networks as explained in the above steps then you have to enter the security keys for both. After entering the Security key, click ‘Next’ to continue to the next step.
Ways to Extend Network settings:
The default SSID of the Amped range extender is ‘Amped AthenaEX_2.4’ for 2.4 GHz and ‘Amped AthenaEX_5.0′ for 5Ghz. ‘Clone’ the settings from your home network to allow the setup wizard to reprint the Security key and SSID of your home network. You also have an option to manually enter a new security key and SSID if you want. Click ‘Next’ to apply and save your settings.
Let us get connected to the new Extended Network:
Your Amped range extender will reboot and the Wi-Fi connection will get disconnected. Now reconnect your tablet or computer to the new extended network. It’s your choice to connect to 2.4 GHz or 5 GHz extended networks. For this, follow the on-screen instructions to connect. Click ‘OK’ after you are connected to the new extended network.
Your Amped Wireless ATHENA-EX RE2600M AC2600 Wi-Fi range extender is now configured and all the settings are saved. You can now find an optimal location to place your extender. The signal strength LED which is located on the top of the extender will help you find the most optimal location.
Conclusion
Enjoy the buffer free high power Amped Wireless Extender.